So I got myself a new toy, the InfiRay P2 Pro thermal (IR) camera. Why? Since I already had the FLIR One Pro? And invested the work to create a Linux application for the FLIR One Pro?
Well, the FLIR One Pro started to annoy me a bit, I have to admit. First of all is has a battery included. Why they did not use the USB type-C port to power the camera is beyond me. So there is now one more battery I need to take care of and which will at some time wear out and break, rendering the pretty expensive device either unusable or having to have to replace the tiny special battery somehow.
Hardware
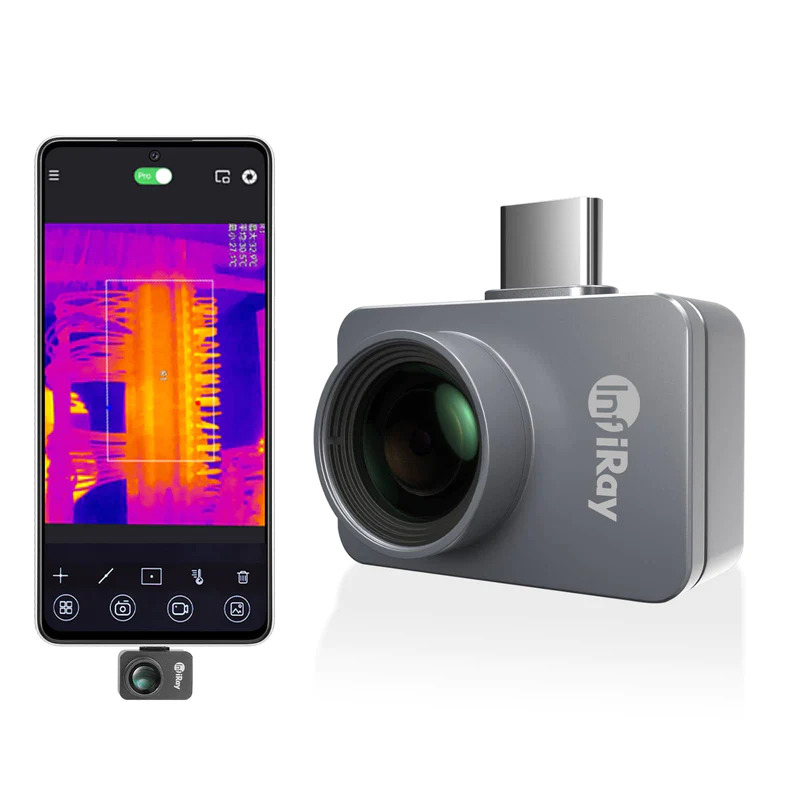
The P2 Pro is really really tiny – I mean, really tiny!

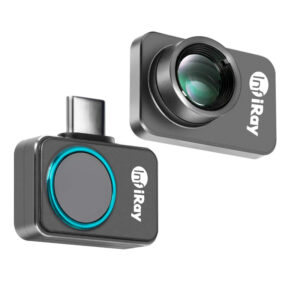
No, it’s not the phone that’s so big, it is indeed the camera being that small! The case is full metal, I assume aluminum. In the above picture the macro lens is already attached, without the lens it looks like this:

It is also very lightweight, just 9g.
Specifications Comparison
But then there are the technical specifications to compare:
| FLIR One Pro | P2 Pro | |
| Thermal resolution | 160 × 120 | 256 x 192 |
| Framerate | 8.7 Hz | 25 Hz |
| Temperature Range | -20°C — 120°C and 0°C — 400°C, ±3°C or ±5% | -20°C — 170°C and -20°C — 550°C, ±2°C |
| Dimensions | 68 × 34 × 14mm, 36.5g | 27 x 18 x 9,8mm, 9g |
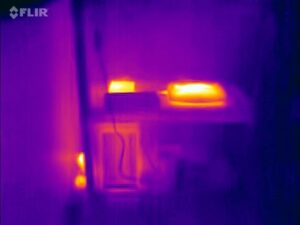
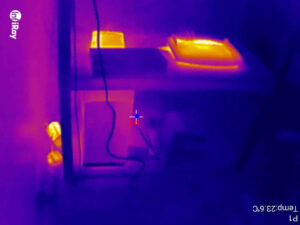
So the P2 Pro has significantly higher resolution (2.56 times more) and almost three times higher frame rate! And this really makes a huge difference. Here are two pictures of the same scene, one taken with the FLIR One Pro and the other with the P2 Pro:


You can see the objects much much clearer, the higher frame rate makes it so much more convenient to use and the overall temperature range per frame also seems higher to me. With the FLIR very often a scene becomes this „there is a very extreme object and all the rest becomes just dark“ whereas with the P2 Pro you can see almost everthing from a scene. Like in the above, which is my small home router rack at home, in the picture from the FLIR you can clearly see the hotspots but everything besides that is rather *meh*. The router itself, to the top right, becomes one glowing block where the P2 Pro still shows some more detail. Overall I also think the noise in the IR stream is a lot lower than with the FLIR One Pro, you get a clearer picture.
On the FLIR One Pro there is also an RGB visible light camera which can be used to overlay onto the thermal image so that you can have some more edges etc. in the thermal image to better differentiate objects. Since the focal length and position of both cameras are not 100% the same you need to tweak alignment settings to get the IR and visible light frames to align properly. If you change the distance from your object, you need to do it again. Not very handy. Also the resulting combined image it not really compelling, I hardly used that feature (in the above sample picture it is also turned off).
The P2 Pro also comes with an optional macro lens. This is really fun! It allows to focus object just a few (about 3 to 5) centimeters away. This is really awesome for debugging electronics, which is my main use case for the thermal camera. (Note to self: Grab some macro pictures to add here 🙂 The macro lens magnetically snaps onto the tiny P2 Pro, very convenient to use.
Both cameras from time to time do an audible „click-click“ self calibration. During the calibration the video stream stops for a brief moment.
Vendor Software
On the software side the FLIR and the P2 Pro are kind of comparable if you just use your smartphone. I had a bit of a rough experience with both apps. The FLIR app more and more develops into the direction like many apps these days, it tries to lure you into signing up for a FLIR account, using their „cloud“ for whatever and luring you into more, of course paid for, services. Also the functionality of the FLIR app is mediocre, in the best case. It is OK, but nothing out of the ordinary. The P2 Pro app is also pretty OK and does its job, though initially it did not work at all when I first installed it. I think the trick is to attach the camera to the phone and then to wait a few seconds until it is fully started up and then to start the app.
Free Software?
You know me by, I would not buy a piece of hardware if it hasn’t any free or open source software support. The FLIR One Pro USB protocol got reverse engineered by some friendly folks and so I was able to base on this to make my own GTK+ based app. That was fun, I learned a bit while going and I also enhanced the code a bit so that now a few more parameters can be read from the FLIR camera. This whole effort is necessary since the FLIR One Pro shows up as a special USB device which needs extra software / driver to control it.
Whereas the P2 Pro shows up as a USB UVC video device! So if you attach this to a Linux box you instantly get a video feed using tools like GUVCView. Initially you will probably get the 256×192 feed which shows a grayscale image feed, this is the IR image captured – voilà! Very simple! And then you can switch to another resolution, 256×384 – and there you now have still the grayscale image on top and on the bottom you have another monochrome image feed and this is supposedly made up from the actual temperature readings of the pixels!
There are two longer thread over at EEVBlog about the P2 Pro, a long review and a long discussion thread with a lot more details than I want to cover here. Based on information from these threads there are some projects now on GitHub that implement viewer applications that run on Linux and other operating systems, everything implemented in Python. One of the first seems to have been:
https://github.com/LeoDJ/P2Pro-Viewer
and using parts of that there is now also:
https://github.com/leswright1977/PyThermalCamera
I couldn’t get the P2Pro-Viewer to work on Debian because of dependency issues, but the more lightweight PyThermalCamera pretty much just worked. There is still room for improvement but I am confident things will happen over time since the P2 Pro is really interesting and it is also not very complicated to implement, it seems. The ease of use is just amazing. You could even script a tool using ffmpeg or other tools grabbing raw frames from the UVC video stream and do the postprocessing yourself. Really great!
Summary
I definitely do not regret the about 230EUR I spent on the P2 Pro – I now have to think about what to do with my FLIR One Pro? The P2 Pro is superior to the FLIR One Pro in pretty much every aspect. No doubts there.
Hello Nicole. Very interesting stuff about thermal cams in Linux. I don’t suppose you’d do a write-up (here or there) on getting one of these to work with Librem5 nicely..? Besides these, would you have any idea if the cheap (for a reason) HT-102 or TIOP01-model USB-C imagers might be made usable in the same manner as these?
Due to your involvement with the Librem5, I thought I might thank you and share a fork that I started work on to make this device more user friendly with the Librem5, Phosh specifically.
https://github.com/fuzzy7k/PyThermalCamera/